Mastering Motherboard Diagnostics: A Comprehensive Guide To Checking Your System
Knowing how to check your motherboard is an essential skill for anyone looking to maintain or upgrade their computer system. Whether you're troubleshooting performance issues or planning a hardware upgrade, understanding your motherboard's specifications and health can save you time and money. In this article, we’ll walk you through the steps to identify your motherboard, assess its condition, and ensure it meets your system's requirements. With detailed insights and actionable tips, you'll be equipped to handle any motherboard-related challenge with confidence.
Modern motherboards are the backbone of your computer, connecting all critical components and enabling seamless communication. However, identifying the right tools and methods to evaluate your motherboard's health can be overwhelming, especially for beginners. This guide simplifies the process by breaking it down into manageable steps. From finding your motherboard model to running diagnostic tests, we'll cover everything you need to know to ensure your system runs smoothly.
Whether you're troubleshooting a faulty connection or preparing for a hardware upgrade, learning how to check my motherboard can help you make informed decisions. By the end of this article, you'll have a clear understanding of the tools, techniques, and best practices for evaluating your motherboard's performance. Let’s dive in and explore the world of motherboard diagnostics!
Read also:Exploring The Life And Legacy Of Zahn Mcclarnons Wife
How Do I Identify My Motherboard Model?
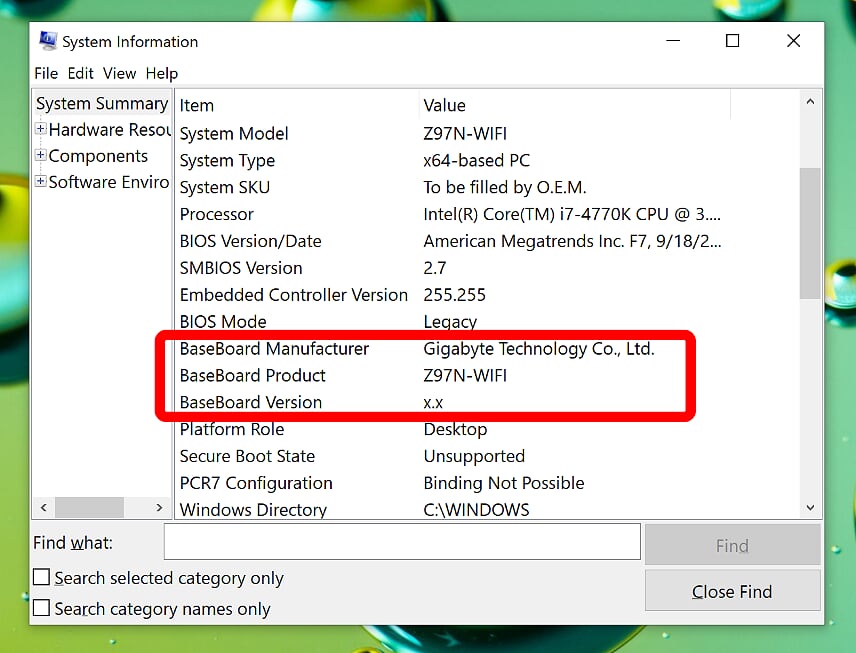
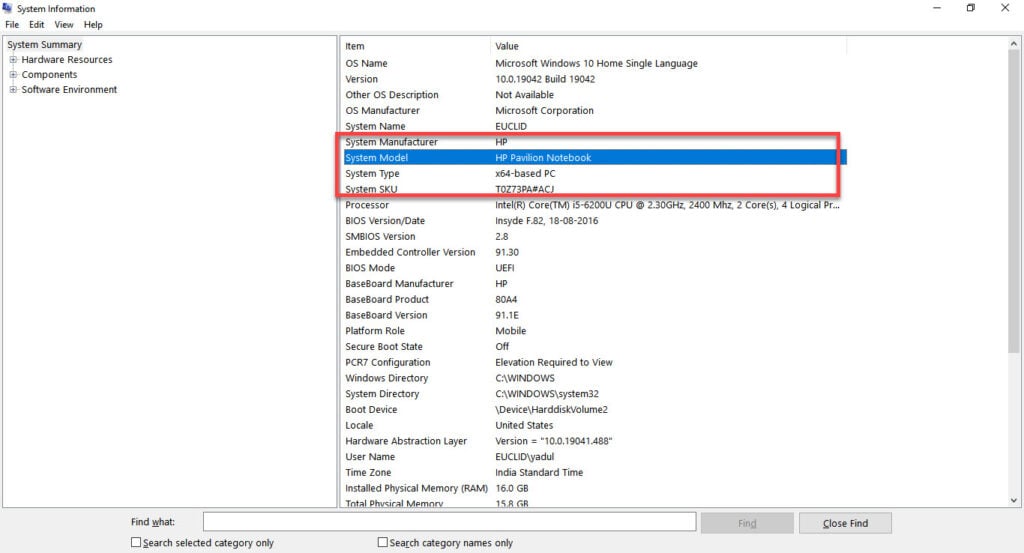
Before diving into advanced diagnostics, it’s crucial to identify your motherboard's model. This information is essential for downloading the correct drivers, firmware updates, and compatibility checks. Here’s how you can quickly find your motherboard model:
- **Use BIOS/UEFI**: Restart your computer and enter the BIOS/UEFI settings by pressing a key like DEL, F2, or ESC during startup. Look for the motherboard model under the system information section.
- **Check Documentation**: Refer to your computer's manual or packaging for details about the motherboard model.
- **Use Software Tools**: Programs like CPU-Z or Speccy can automatically detect and display your motherboard's specifications.
What Are the Signs of a Failing Motherboard?
A failing motherboard can lead to frustrating system issues, ranging from random shutdowns to complete system failure. Recognizing the warning signs early can help you take preventive measures. Below are some common symptoms:
- **Random Restarts**: If your computer shuts down or restarts unexpectedly, it could indicate a motherboard issue.
- **Blue Screen Errors**: Frequent blue screen crashes with error codes may point to motherboard problems.
- **Overheating**: Excessive heat buildup can damage motherboard components, leading to performance degradation.
How Can I Test My Motherboard’s Health?
Testing your motherboard's health involves a combination of visual inspections and diagnostic tools. Here are some effective methods:
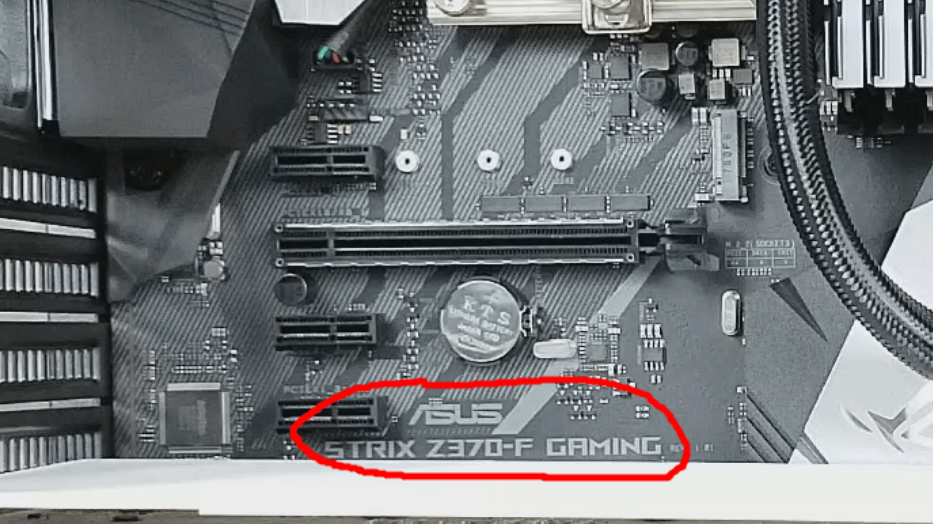
- **Visual Inspection**: Check for physical damage such as burnt capacitors, corrosion, or bent pins.
- **POST Code Reader**: Use a POST (Power-On Self-Test) code reader to identify startup errors.
- **Stress Testing**: Run stress tests using software like Prime95 or MemTest86 to evaluate stability under load.
Why Is It Important to Know How to Check My Motherboard?
Understanding how to check my motherboard empowers you to troubleshoot issues effectively and optimize your system's performance. Whether you're dealing with compatibility problems or planning a hardware upgrade, having detailed knowledge of your motherboard's capabilities is invaluable. Here’s why:
- **Preventive Maintenance**: Regular checks can help you identify potential issues before they escalate.
- **Compatibility Assurance**: Knowing your motherboard’s specifications ensures that new components will work seamlessly with your system.
- **Cost Savings**: Identifying and resolving motherboard issues early can save you from costly repairs or replacements.
What Tools Do I Need to Check My Motherboard?
While some motherboard checks can be done without additional tools, having the right equipment can enhance accuracy. Here’s a list of essential tools:
- **POST Code Reader**: Identifies startup issues by displaying error codes.
- **Multimeter**: Measures voltage levels to detect power supply problems.
- **Diagnostic Software**: Programs like MemTest86, Prime95, and CPU-Z provide detailed insights into system health.
How to Check My Motherboard for Compatibility?
When upgrading your system, ensuring compatibility between components is crucial. Here’s how you can verify your motherboard’s compatibility:
Read also:Kannada Movie Rulez2 A Cinematic Marvel Redefining South Indian Cinema
- **Check Specifications**: Refer to the motherboard manual or manufacturer’s website for supported components.
- **RAM Compatibility**: Verify that your RAM type, speed, and capacity match the motherboard’s requirements.
- **CPU Socket**: Ensure your CPU is compatible with the motherboard’s socket type.
What Are the Best Practices for Maintaining My Motherboard?
Proper maintenance extends the lifespan of your motherboard and ensures optimal performance. Follow these best practices:
- **Clean Regularly**: Remove dust and debris using compressed air to prevent overheating.
- **Update Firmware**: Keep your motherboard’s BIOS/UEFI firmware up to date for improved stability and features.
- **Monitor Temperatures**: Use monitoring software to track component temperatures and address overheating issues promptly.
How Often Should I Check My Motherboard?
The frequency of motherboard checks depends on your system usage and environment. As a general guideline:
- **Regular Users**: Perform checks every 6-12 months to ensure everything is functioning correctly.
- **Enthusiasts**: If you frequently upgrade or overclock your system, monthly checks are recommended.
- **Troubleshooting**: Conduct immediate checks if you notice any unusual symptoms or performance drops.
How Can I Replace My Motherboard If Needed?
Replacing a motherboard requires careful planning and execution. Follow these steps to ensure a smooth transition:
- **Backup Data**: Transfer all important files to an external drive or cloud storage.
- **Disconnect Components**: Safely remove all connected components, including the CPU, RAM, and storage drives.
- **Install New Motherboard**: Follow the manufacturer’s instructions to install the new motherboard and reconnect components.
Conclusion: Empower Yourself with Knowledge
Learning how to check my motherboard is a valuable skill that enhances your ability to maintain and upgrade your computer system. By following the steps and best practices outlined in this guide, you’ll be well-equipped to handle any motherboard-related challenges. Remember, regular maintenance and timely checks are key to ensuring your system runs smoothly for years to come.
Table of Contents
- How Do I Identify My Motherboard Model?
- What Are the Signs of a Failing Motherboard?
- How Can I Test My Motherboard’s Health?
- Why Is It Important to Know How to Check My Motherboard?
- What Tools Do I Need to Check My Motherboard?
- How to Check My Motherboard for Compatibility?
- What Are the Best Practices for Maintaining My Motherboard?
- How Often Should I Check My Motherboard?
- How Can I Replace My Motherboard If Needed?
- Conclusion: Empower Yourself with Knowledge
Article Recommendations